
Laravel Livewire Crud - Part 01 (Add Data to Database)
LARAVEL
LIVEWIRE
Hello friends, today in this blog you’ll learn how to add data to database with laravel livewire crud operation in a very simple way.
Laravel Livewire is a library that makes it simple to build modern, reactive, dynamic interfaces using Laravel Blade as your templating language. This is a great stack to choose if you want to build an application that is dynamic and reactive but don't feel comfortable jumping into a full JavaScript framework like Vue.
Now, lets see how we can add data to database with laravel livewire crud operation in a very simple way.
You can also check our video tutorial about how to add data to database laravel livewire crud operation.
Video Tutorial of Laravel Livewire Crud - Add Data
Step 01: Install livewire and setup layouts
If you don't know how to install livewire and setup layouts, read this post-
Link: Laravel Livewire Installation and Layout Setup
Step 02: Create Database & Tables
Now, create a database, use this in .env file as bellow,
DB_CONNECTION=mysqlDB_HOST=127.0.0.1DB_PORT=3306DB_DATABASE='Your Database Name'DB_USERNAME=rootDB_PASSWORD=
Now, create Student table Model and Migration with this command
php artisan make:model Student -m
Now, go to database/migrations and open create_students_table_migration.php file and paste this code inside up() function,
Schema::create('students', function (Blueprint $table) {$table->id();$table->string('student_id')->unique()->nullable();$table->string('name')->nullable();$table->string('email')->unique()->nullable();$table->string('phone')->unique()->nullable();$table->string('status')->default('1');$table->timestamps();});
now, go to App/Models and open Model.php file and paste this code inside model class file,
protected $table = 'students';
now, migrate the migrations with this command
php artisan migrate
Step 03: Make Livewire Component
Create a livewire component named 'AddStudentComponent' with this command
php artisan make:livewire AddStudentComponent
This will make two file one is in App/Http/livewire directory named 'AddStudentComponent.php' and another is in resources/views/livewire directory named 'add-student-component.blade.php'
Now, go to add-student-component.blade.php file and use the following code,
<div><div class="container"><div class="row justify-content-center mt-5"><div class="col-md-5"><div class="card"><div class="card-header"><h5 class="card-title" style="float: left;">Add New Students</h5><a href="{{ route('students') }}" class="btn btn-sm btn-primary" style="float: right;">All Students</a></div><div class="card-body">@if (session()->has('message'))<div class="alert alert-success text-center">{{ session('message') }}</div>@endif<form wire:submit.prevent="storeStudent"><div class="form-group"><label for="student_id">Student ID</label><input type="number" class="form-control" wire:model="student_id" autocomplete="off" />{{-- for validation --}}@error('student_id')<span class="text-danger" style="font-size: 12.5px;">{{ $message }}</span>@enderror</div><div class="form-group"><label for="name">Name</label><input type="text" class="form-control" wire:model="name" autocomplete="off" />{{-- for validation --}}@error('name')<span class="text-danger" style="font-size: 12.5px;">{{ $message }}</span>@enderror</div><div class="form-group"><label for="email">Email</label><input type="email" class="form-control" wire:model="email" autocomplete="off" />{{-- for validation --}}@error('email')<span class="text-danger" style="font-size: 12.5px;">{{ $message }}</span>@enderror</div><div class="form-group"><label for="phone">Phone</label><input type="number" class="form-control" wire:model="phone" autocomplete="off" />{{-- for validation --}}@error('phone')<span class="text-danger" style="font-size: 12.5px;">{{ $message }}</span>@enderror</div><div class="form-group text-center"><button type="submit" class="btn btn-primary btn-sm w-50">Add Student</button></div></form></div></div></div></div></div></div>
and go to AddStudentComponent.php file and use the bellow code inside the component class file,
public $student_id, $name, $email, $phone;public function updated($fields){$this->validateOnly($fields, ['student_id' => 'required|unique:students','name' => 'required','email' => 'required|email|unique:students','phone' => 'required|numeric|unique:students',]);}public function storeStudent(){$this->validate(['student_id' => 'required|unique:students','name' => 'required','email' => 'required|email|unique:students','phone' => 'required|numeric|unique:students',]);$student = new Student();$student->student_id = $this->student_id;$student->name = $this->name;$student->email = $this->email;$student->phone = $this->phone;$student->save();session()->flash('message','Student has been added successfully');$this->student_id = '';$this->name = '';$this->email = '';$this->phone = '';}public function render(){return view('livewire.crud.add-student-component')->layout('livewire.layouts.base');}
Step 04: Make Route
Now, go to routes directory and open web.php file and add this route,
Route::get('add-student', AddStudentComponent::class)->name('addStudent');
Now, run the application with this command
php artisan serve
open your browser and go to,
http://127.0.0.1:8000/add-student
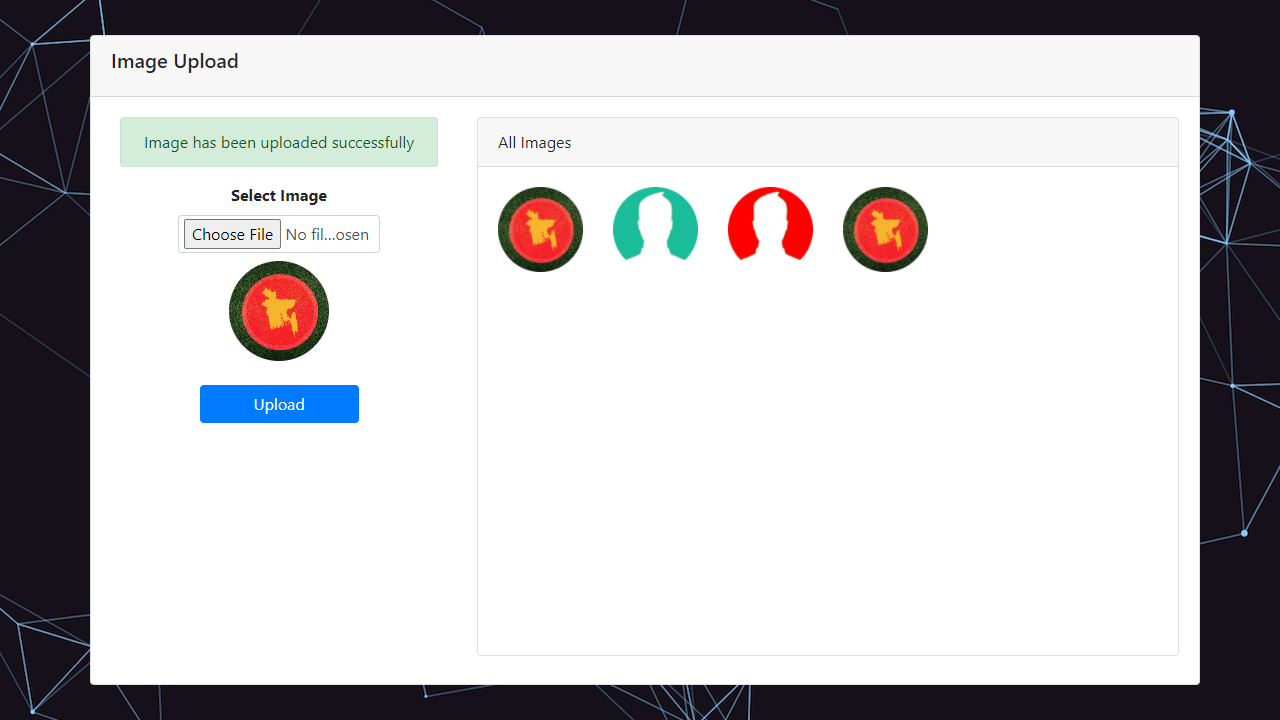
you will see output like this,


Comments (0)
Leave a Comment
You need to login to post a comment
Login to Comment